
Your first day on Urbit
You're on the network - now what?

12/15/2022 Update: With new groups and talk apps, a lot of the UI shown here is now out of date. Thankfully the new groups and talk apps are a lot easier to use and the landscape UI has also been improved. The basics around installing apps and joining groups remain the same (and the hosts of the apps and groups are the same too).
So you’ve managed to get on the network, maybe you did it with a comet that you’re running on your local machine or maybe you just signed up for an account on tlon.network. Either way - you’ve been dropped into this new place and are wondering what to do next.
While there’s a lot of development work going into the core Urbit OS and new version of the main chat application, the discoverability of how to use basic parts of the UI leaves a lot to be desired. This is an important problem that it’s critical for us to improve in the product, but as it is - a basic post that gives some prescriptive first steps will make things easier. If this post is successful it should serve as a single page new users can go to, to get up to speed with the basics of how to use their new computer.
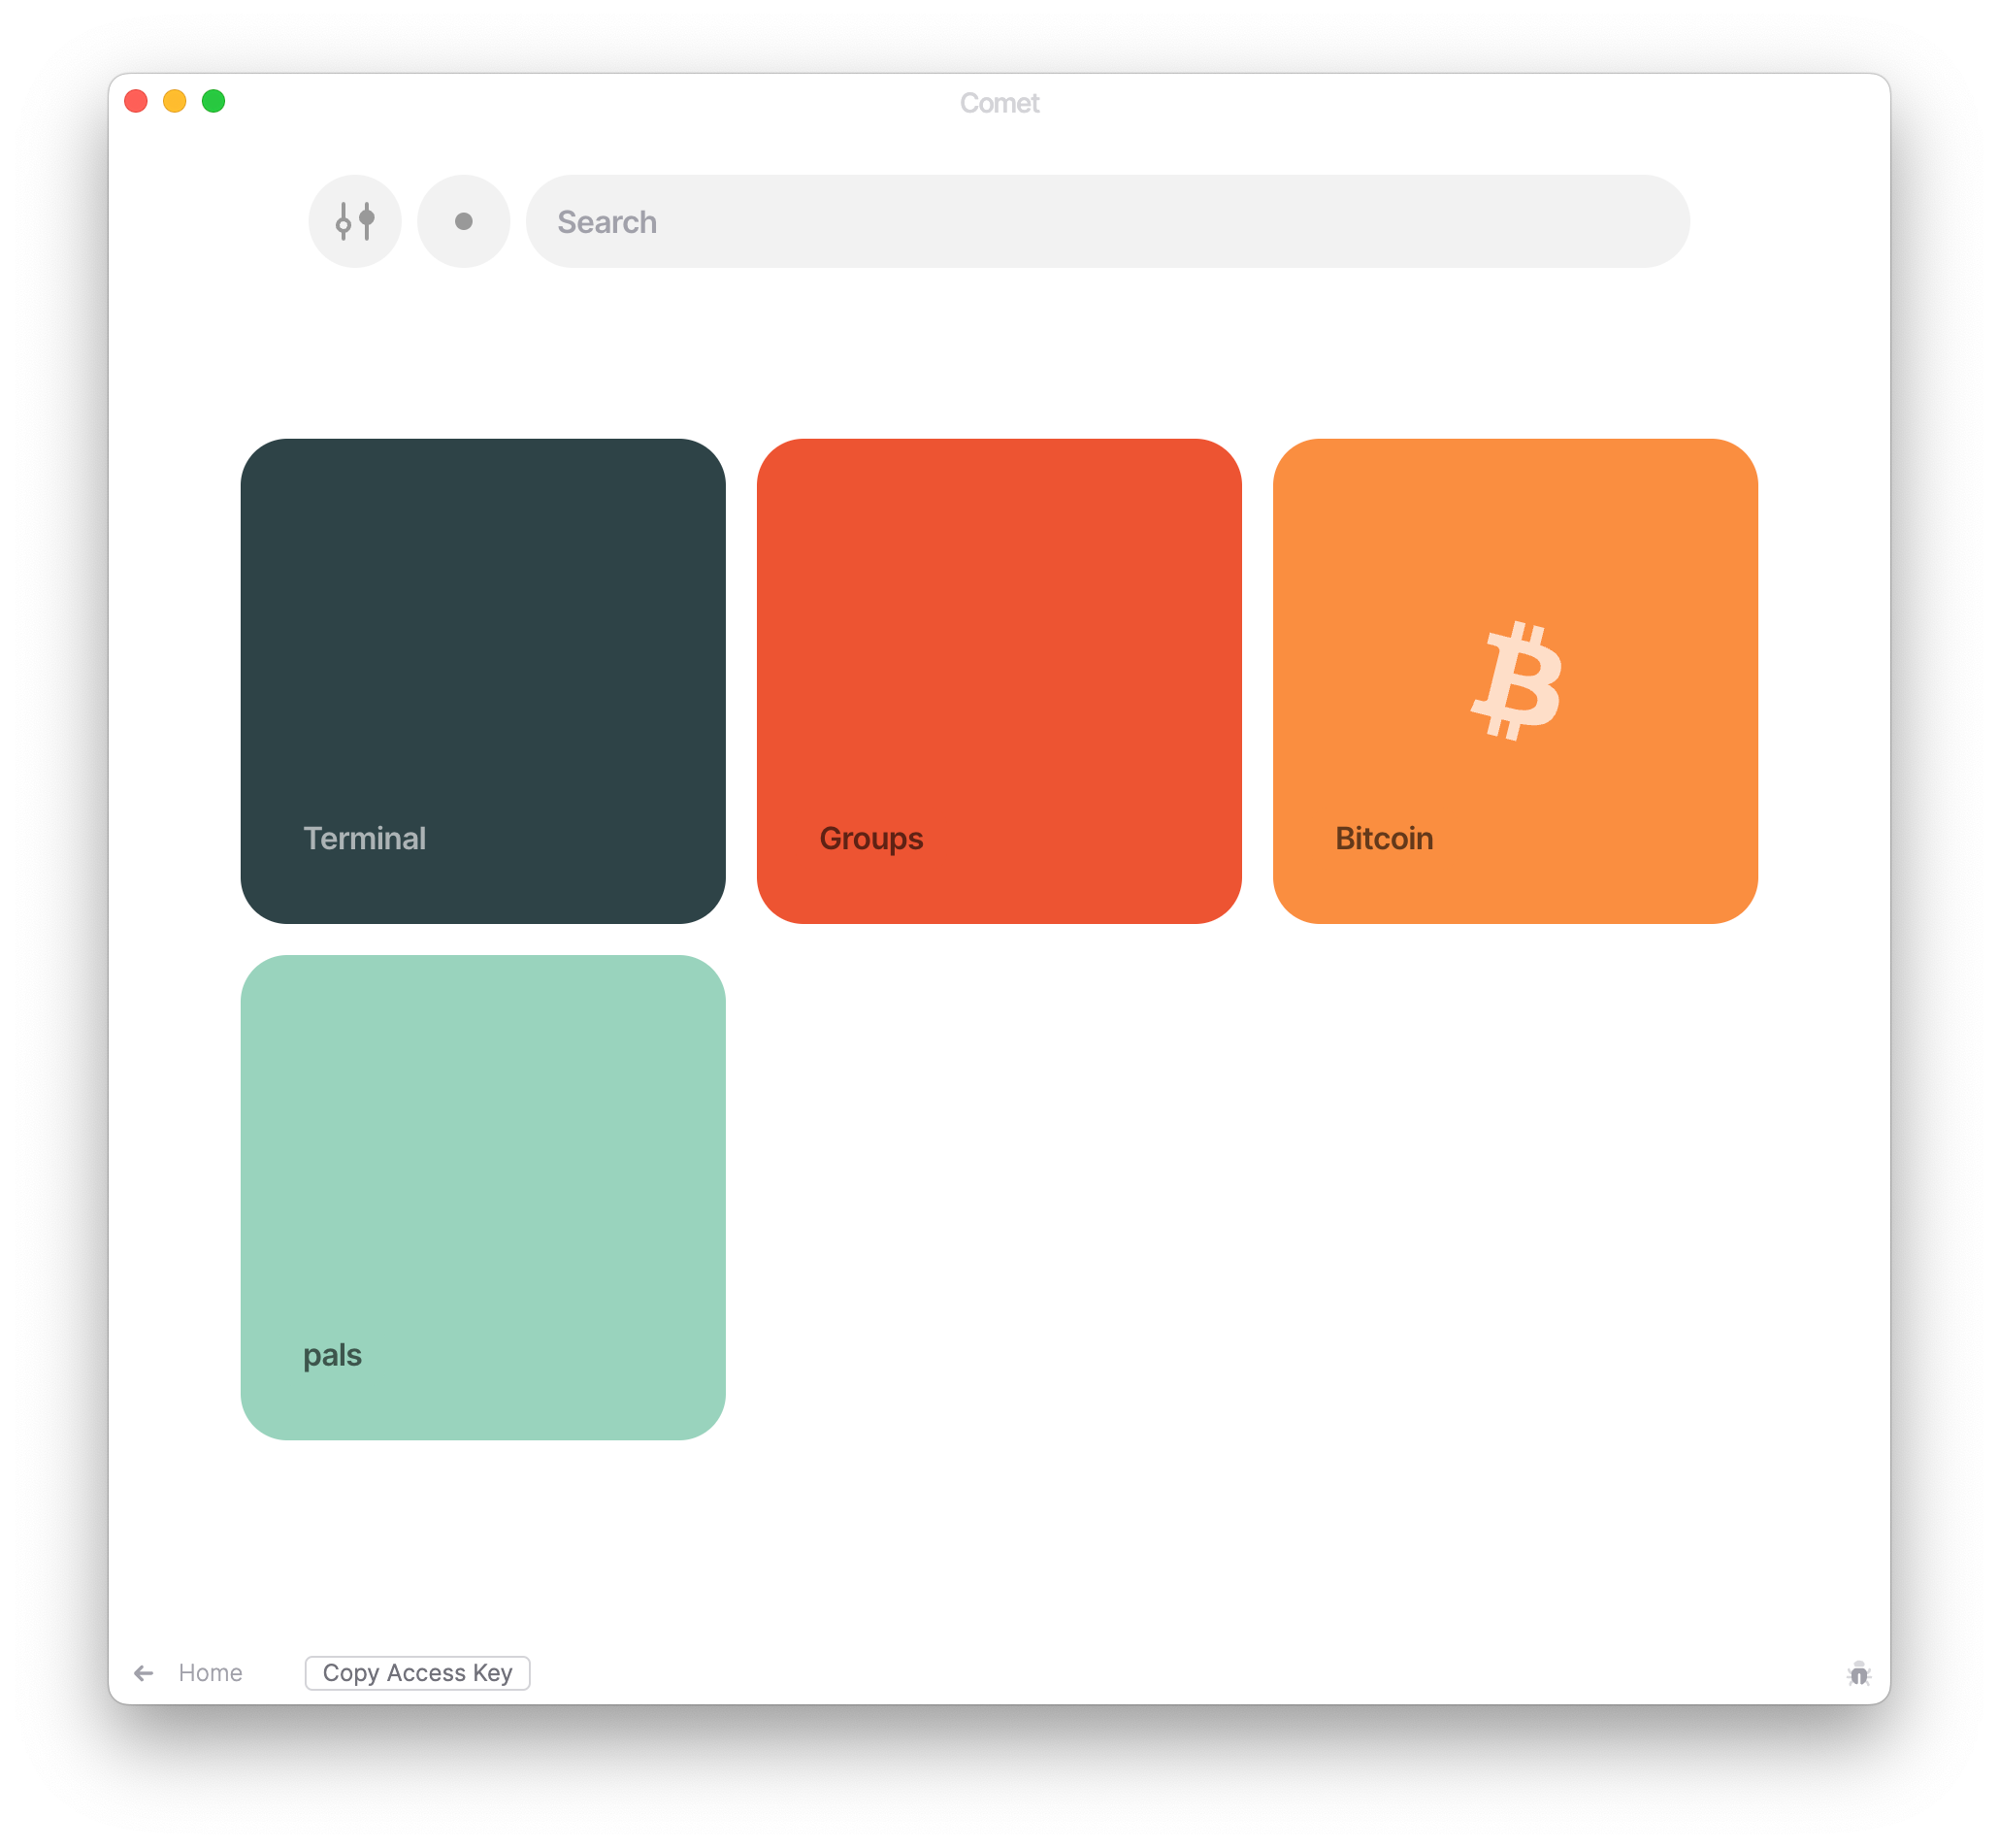
When you first log into landscape (the name of the home screen that shows you your installed apps), it’ll look like this:

There are a few things to know right off the bat:
The Bitcoin app requires running a full bitcoin node or knowing somebody who does. Just ignore it, it probably should be removed from the default distribution unless the foundation is going to run a node for people on the network to use.
The terminal is what it sounds like - if you’re running locally it’s the same as your local Urbit terminal. If you’re hosted, it’s a way to enter commands into your Urbit. We won't be needing it for this guide, but if you have it open you can see output from the other actions we’re taking.
The circular top buttons are system preferences on the left and notifications on the right. They’re pretty self explanatory so we’re going to pass over them for this guide.
The search bar is what we’re going to use to install applications from other users across the network, in order to do this we need to know what Urbit ID is distributing the application. Unfortunately, there’s no way to discover this in the UI itself out of the box (a bit like trying to find URLs on the web before Google) so I’m going to tell you the default apps I think you should install. In the future this will be better.

The first application is pals, if you search ~paldev as shown above you’ll see it appear as a software provider. Clicking on that will show all of the apps created by ~paldev, one of which is pals. Click pals and click through the windows to install it.
You’ve installed your first app! Pals is a very basic list of other Urbit IDs that you’re ‘pals’ with. The important bit though is that other applications in Urbit can use knowledge of your pals to do other things (something we’ll see in a minute). Go ahead and add me (~dovsem-bornyl) as a pal to kick things off.
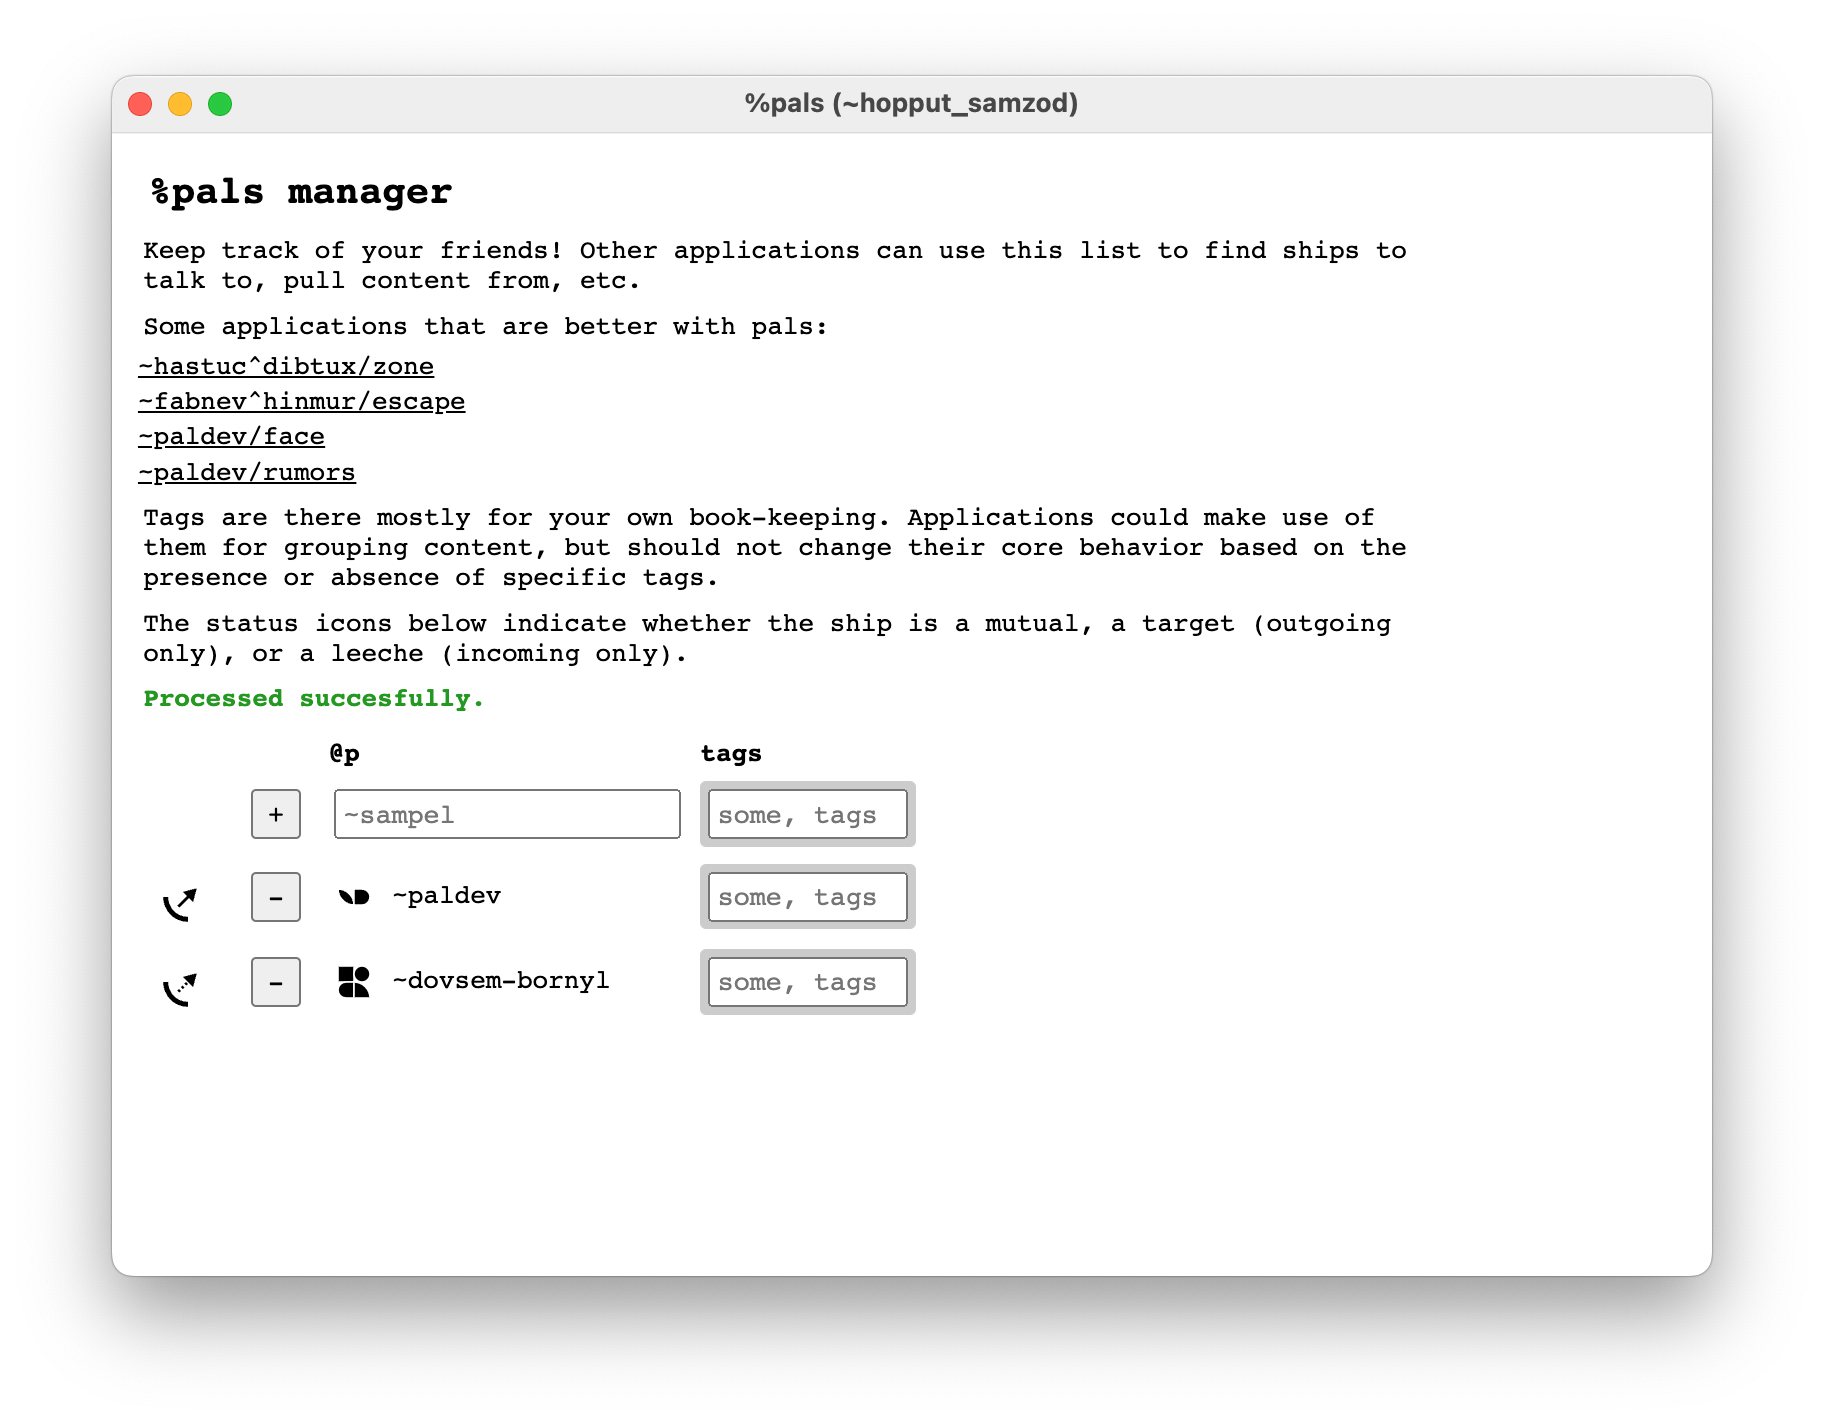
The outgoing arrow means that you’ve added me, but I haven’t yet added you. Incoming arrows mean the opposite and a smiley face is a mutual connection. Let’s grab some other basic applications from developers that distribute them. Search each of the following.
~dister-nocsyx-lassul - You’ll see two apps from this developer, but Sphinx is what we want right now. Sphinx is a search application that creates an index based on what your pals have added to their sphinx. It helps a lot with out of the box discovery that’s missing, but only if you already have some pals.
~holnes - This developer created the basic Contacts app for Urbit. It can import the Urbit IDs from your pals. It also works the way contacts should work which is something that shows off the power of Urbit. You configure the contact info you want public (name, twitter, etc.) and when someone adds you as a contact they get access to your contact details. When you update your details, they get the update. No more out of date contacts. The contact info is public for now, but privacy restrictions/requests are coming in a future release.
~paldev - Let’s get a couple more fun apps from paldev, specifically rumors and face. Rumors lets people who have the app post short anonymous posts to a single board, face lets you add an image of yourself if you want to and also shows you all of your pals that did the same.
Ok - we’ve got some basic apps and a rough idea of how to find them. It’s important to know that you should only install apps from sources you trust. We’re working on user space permissions that restrict app access, but for now a bad application can run arbitrary commands on your Urbit. You can find more applications on the urbit.org website.
Let’s take a look at groups (the other default application).
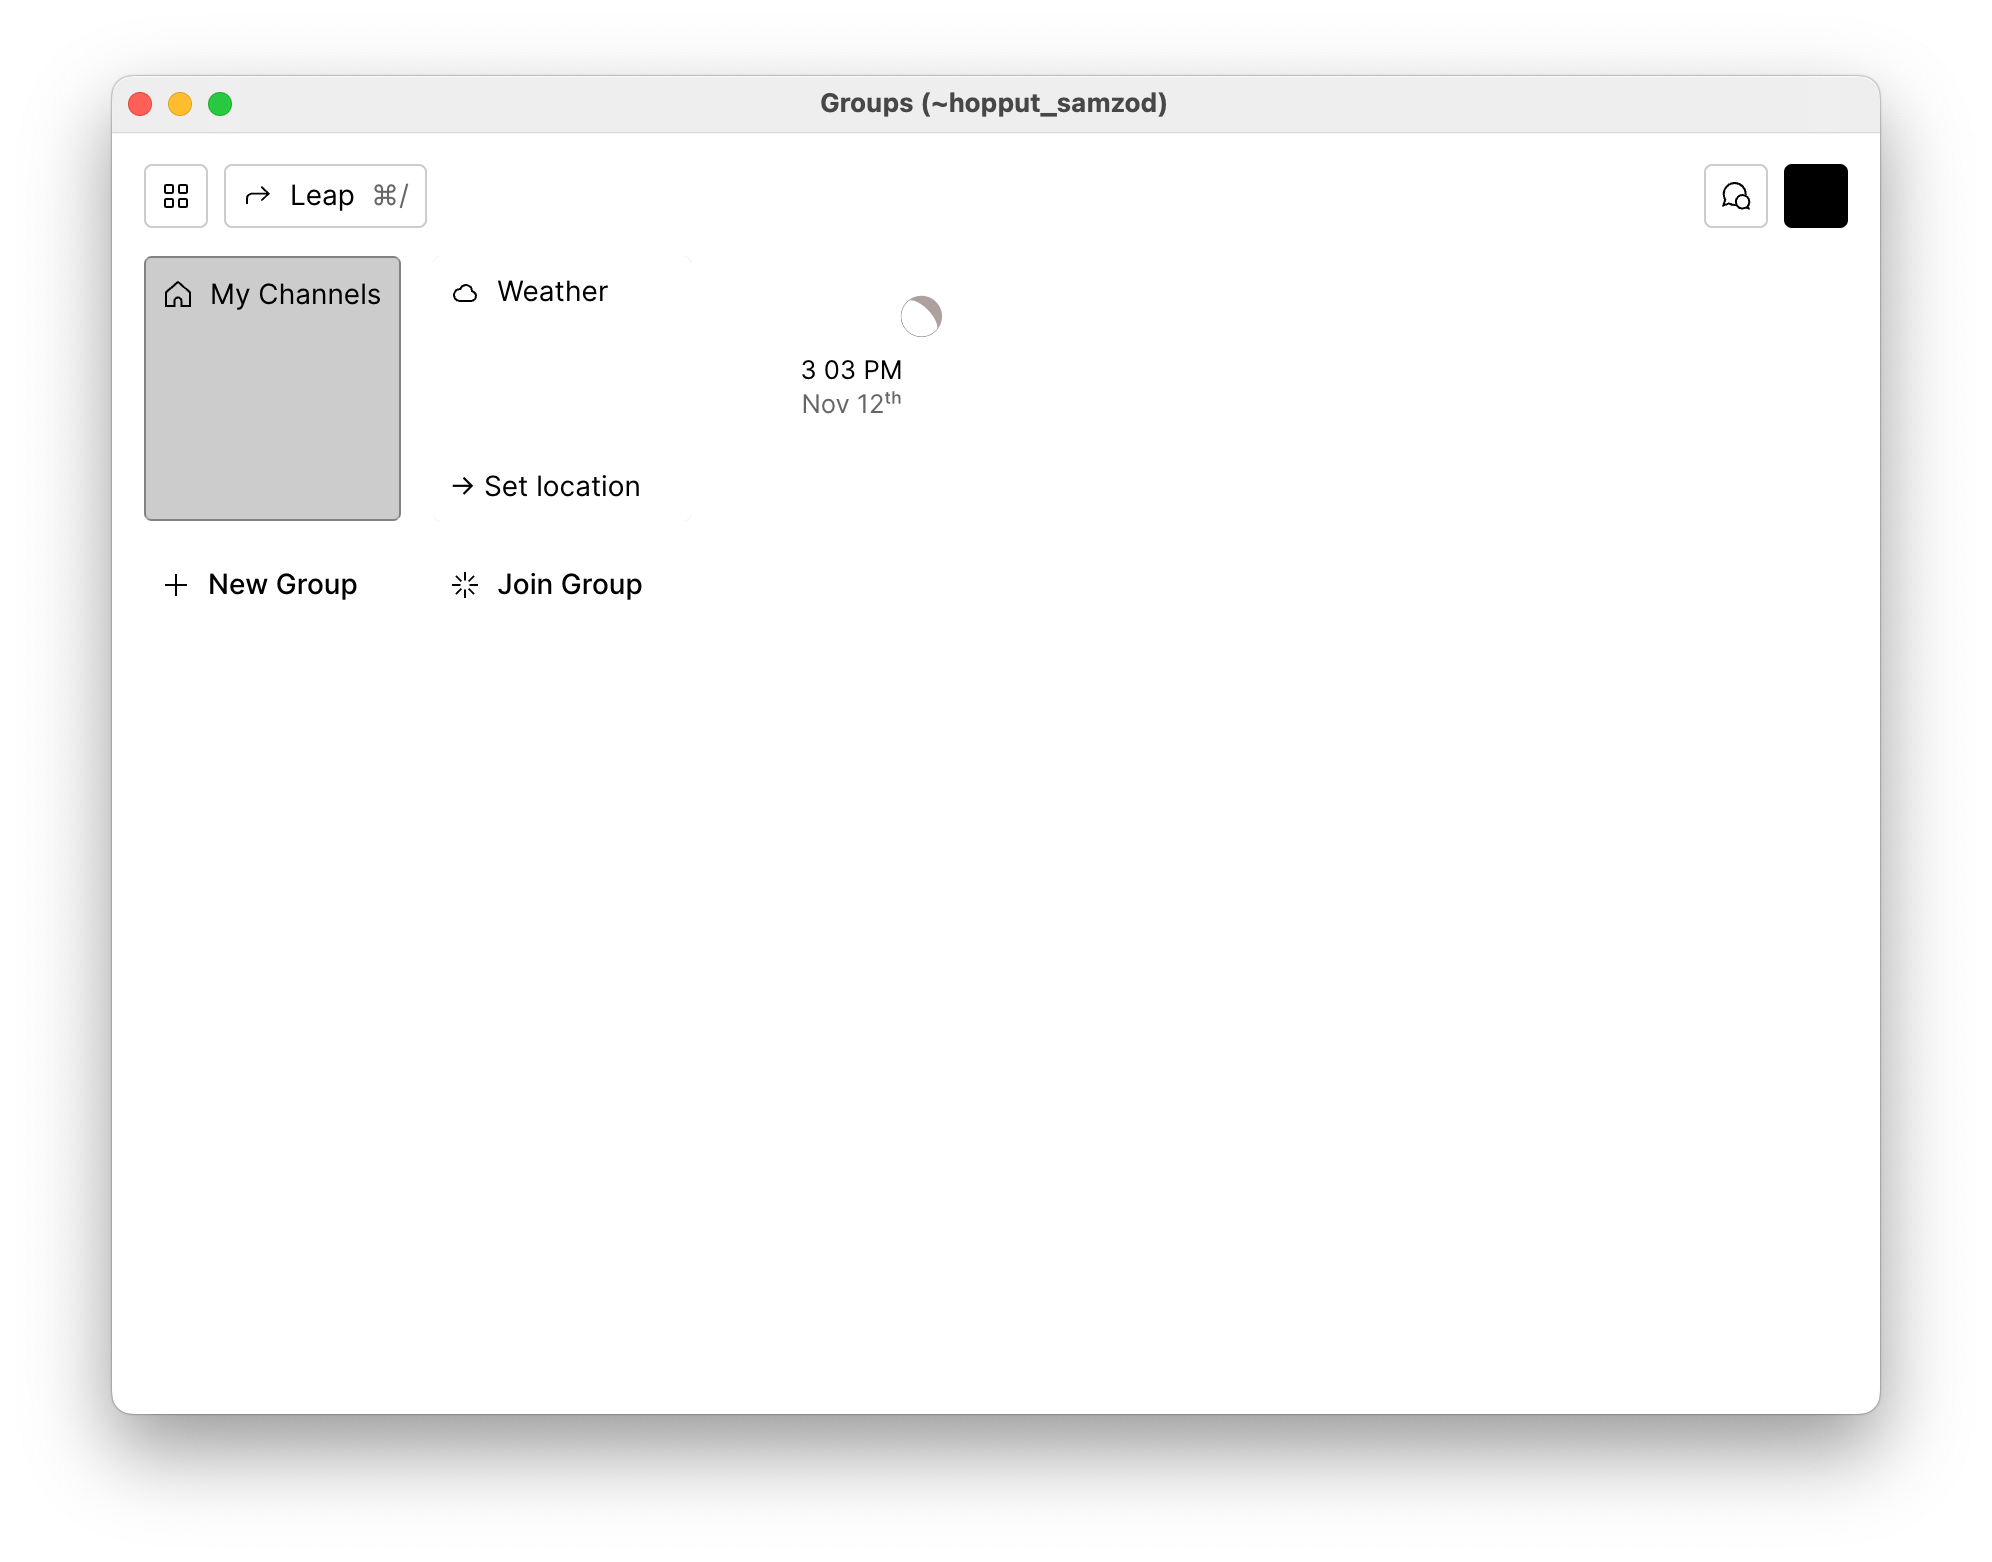
When you first open groups you’re greeted with a nearly blank screen.
In the top right you’ll see a chat bubble (this is where direct messages live and how you can send DMs to other Urbit IDs) and a square for your profile (if you’re a planet this will be where you’re sigil is, if you’re a comet it’ll be black as shown above). The square for your profile also has a link to ‘system preferences’ for groups - you can mostly ignore this, but there is a toggle you should switch on in there for Direct Messages: “Auto-accept DM invites”. That will make it so you don’t have to approve every incoming direct message.
Click the profile square and edit your profile, then check the box to make it public. After you do this other users on the network can open your profile to learn a little bit about you. With that done, click the top left most icon to go back to the main groups page. Leap is a search tool for the groups app, but isn’t important for now.
The New Group button lets you create your own group, but remember it’s running on your Urbit - if you shut off your Urbit your group will be offline and members won't be able to access it. For this reason most users host their Urbit in the cloud as a personal cloud OS where it can be running all of the time. I’ll go into this in the next substack post. Let’s skip this for now.
Clicking Join Group gives you a pop-up window asking you to specify a group host, but with no built in way to find any of them - so I’m going to get you started.
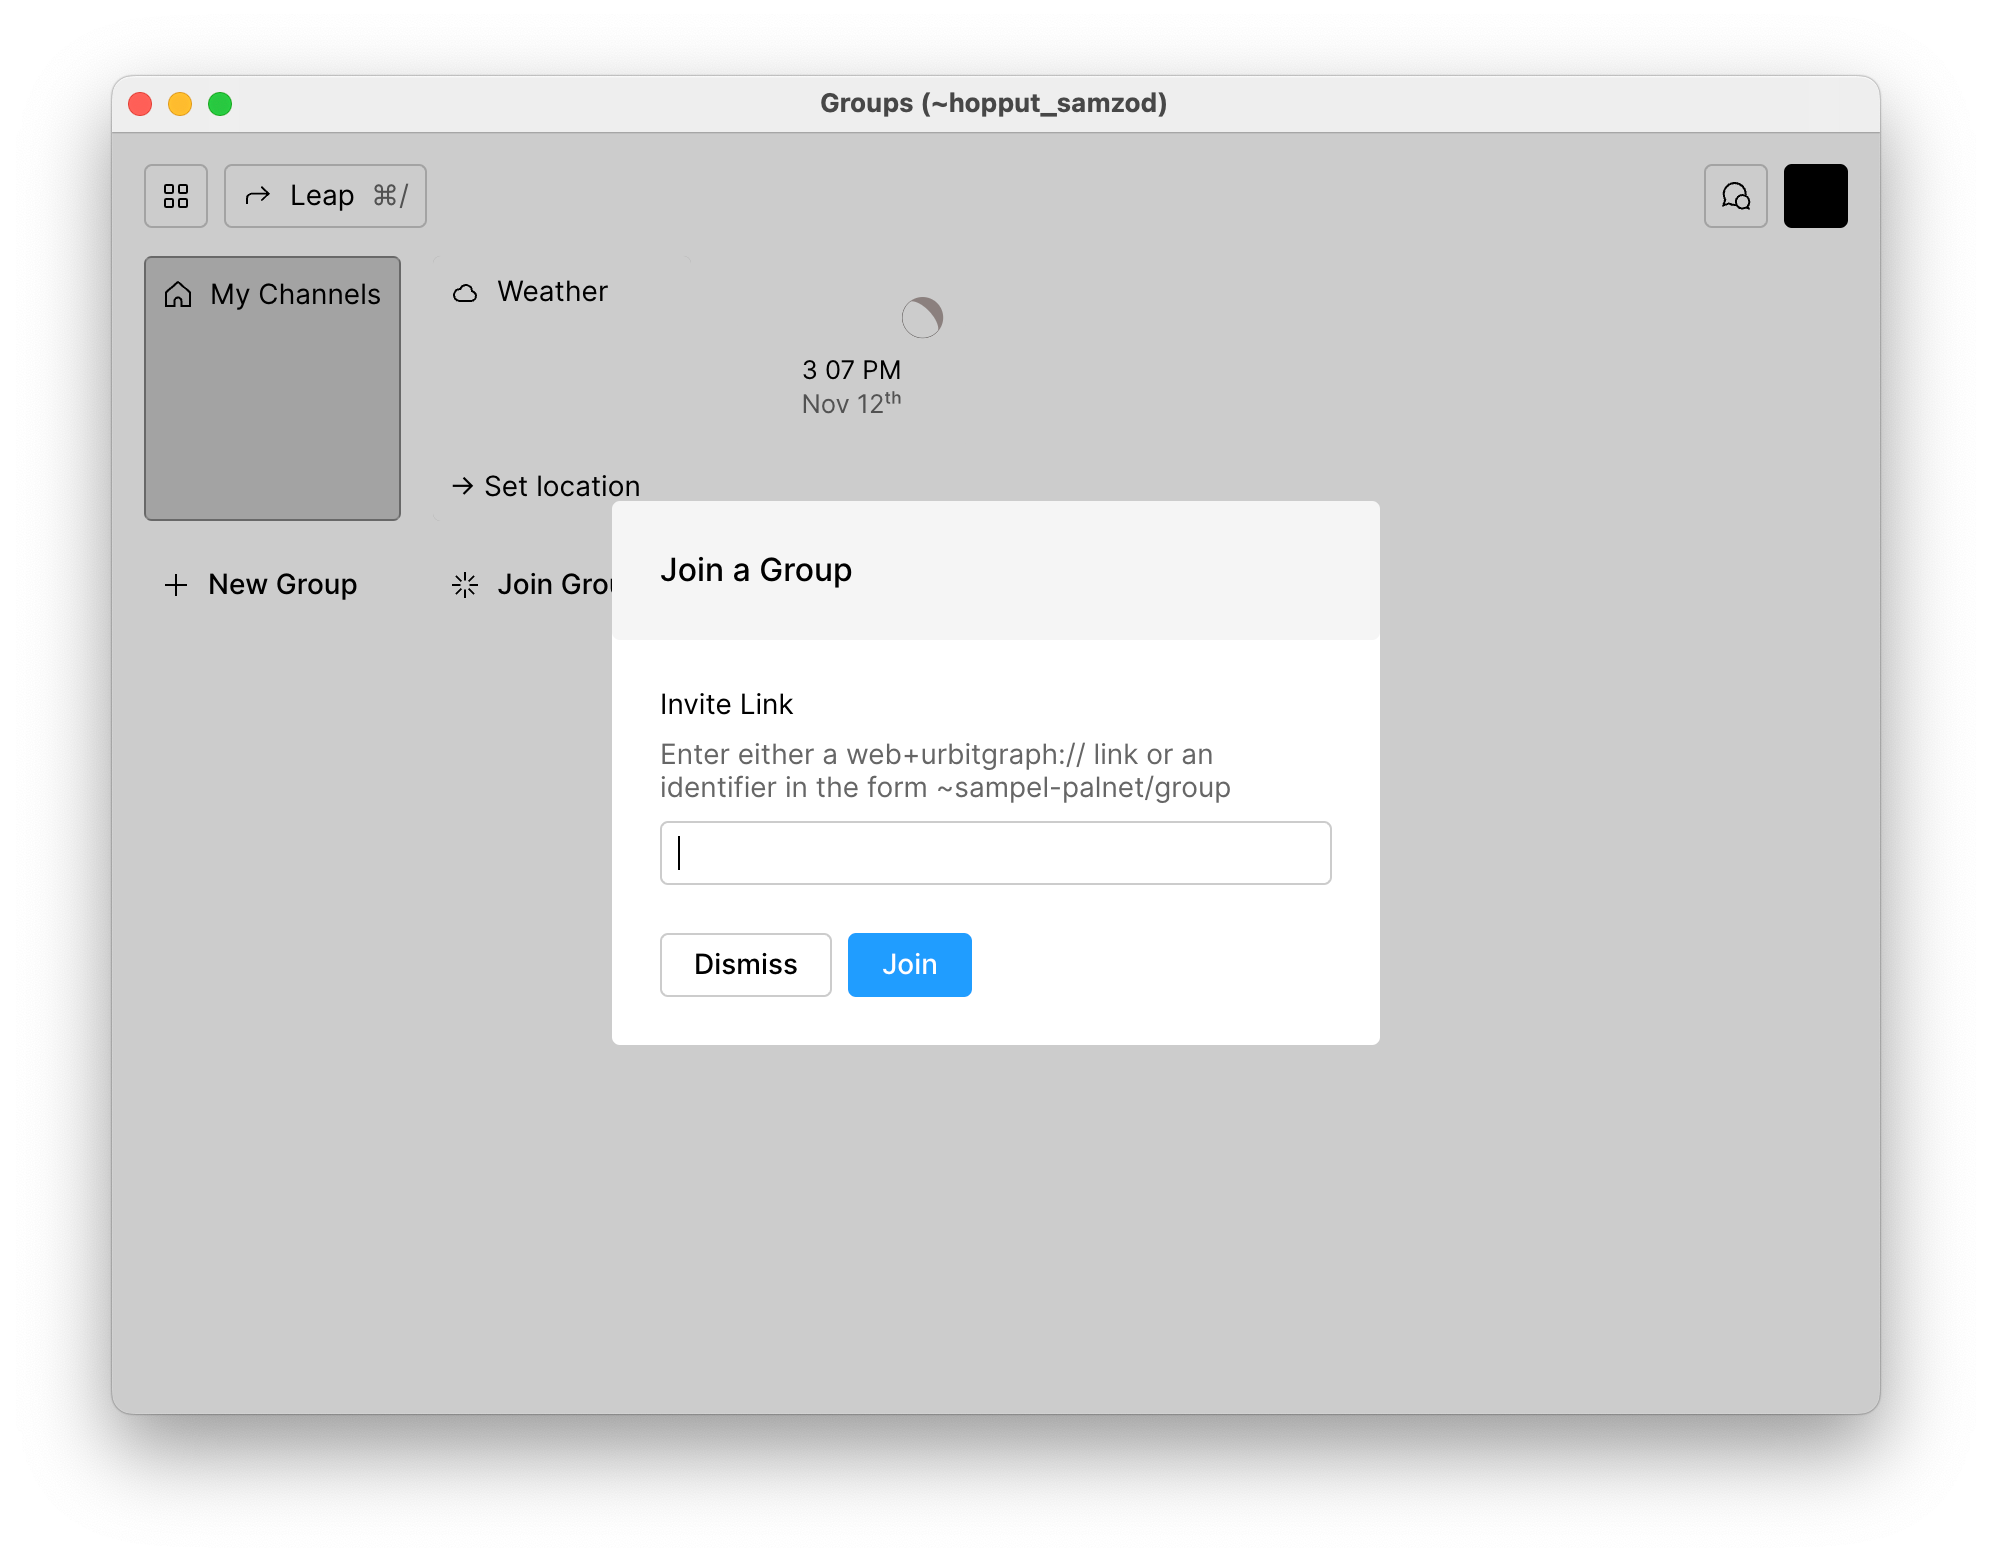
Let’s join some groups!
~rondev/group-discovery
A group to help you find other groups. When you paste this in the join field and click Join you’ll see the below image. Share identity allows users in that group to see your public profile. Join all channels will join all of the groups channels on join (otherwise you’ll have to manually join each one).
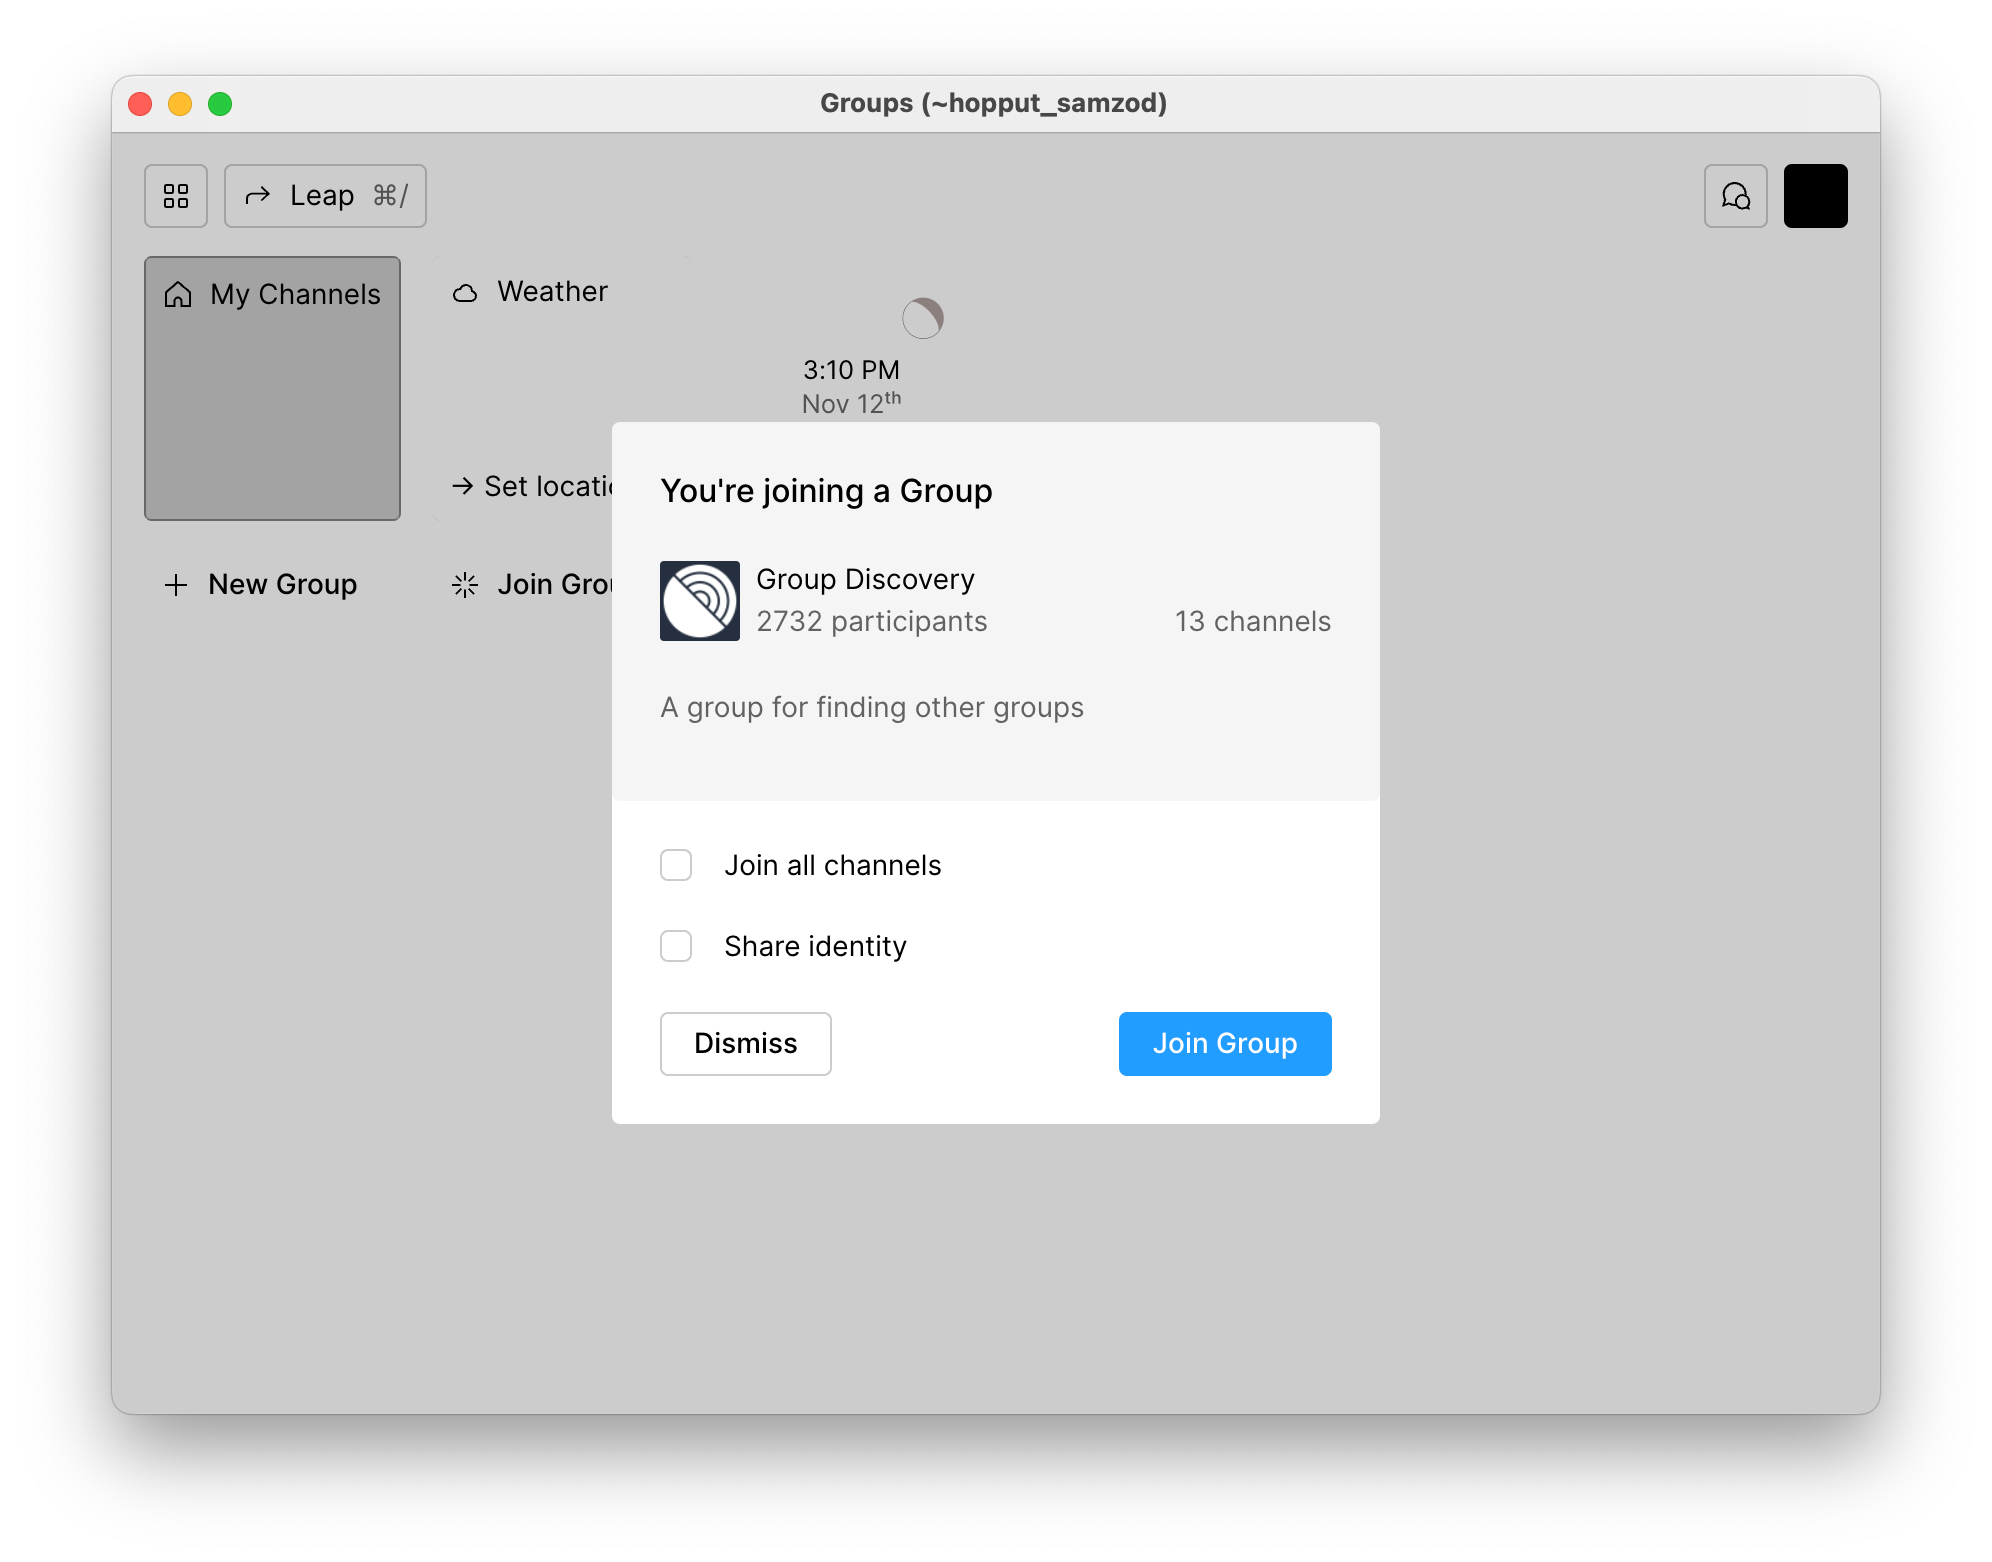

You’ve joined your first group! The notebooks in there have posts that will help you find other groups. The chats let you engage with other users on the network.
The other group you should join is ~bitbet-bolbel/urbit-community which is one of the most active groups on Urbit. There’s always discussion going on in that group and it’s easy to find other people interested in Urbit there that can help you out.
If you’re curious about writing code on Urbit, you should also join ~hiddev-dannut/new-hooniverse where you can find details about the upcoming hoon school classes.
That should be enough to get you comfortable getting around in Urbit your first day while giving you a path to discover more. The next post will be focused around approaches for running your Urbit on your home network while still having it accessible outside of it on your other devices. I’m also thinking about doing deep dives into specific apps with the devs that wrote them, and when the new version of Groups launches they’ll be a lot of interesting stuff to talk about. Plus some forward looking posts thinking through what Urbit’s design makes possible.
See you on the network!